Keeping your pool looking sparkling fresh requires a commitment to care that takes place weekly, as well as annual care actions that are needed to promote the longevity of your pool. If you have been struggling with keeping the finish on your pool looking beautiful, it might be time to recoat the surface of your pool. Chlorinated Rubber paint is one of the best choices for this process as it is affordable, easy to apply, helps with overall maintenance, has durable protection and makes your pool looking brand new.
This coating can be used for indoor and outdoor pools and provides lasting protection from algae, mildew, alkalis, and also pool chemicals. If you are ready to learn more about recoating your pool using Chlorinated Rubber paint, read on!
Steps to Refresh Your Pool Using Chlorinated Rubber
This process must be followed step-by-step to get the best results from your pool painting process. Skipping steps or not taking care to complete them could lead to problems with the performance of the coating after it has been applied.
1. Selecting the Right Coating
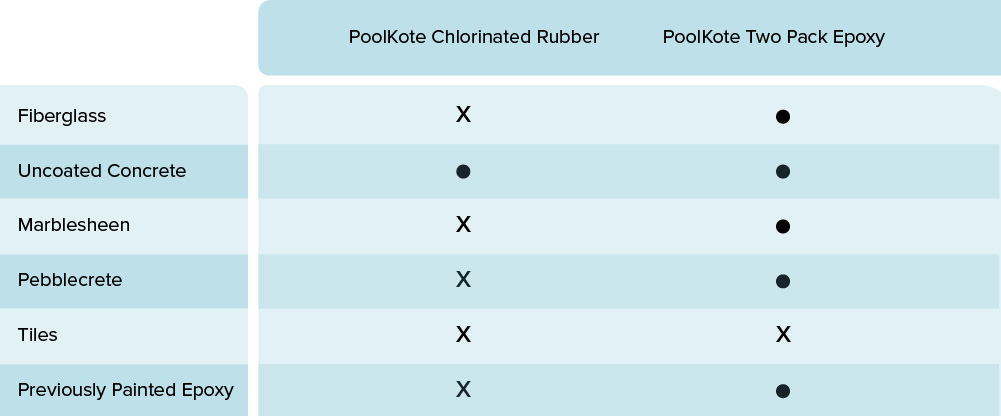
If a pool has been previously painted with epoxy or chlorinated rubber, only the same coating can be applied over it. Unless you sandblast or grind the entire surface to remove the existing coatings, then you can choose either option. To find out what coating your pool currently has rub a small area of the pool surface with Acetone, if the coating starts to react and break down becoming sticky and soft, it is most likely to have a Chlorinated Rubber coating. However, if the surface remains unaffected, then most likely has an epoxy coating. Review the below table first to confirm that Chlorinated Rubber is the correct coating to use for your pool.
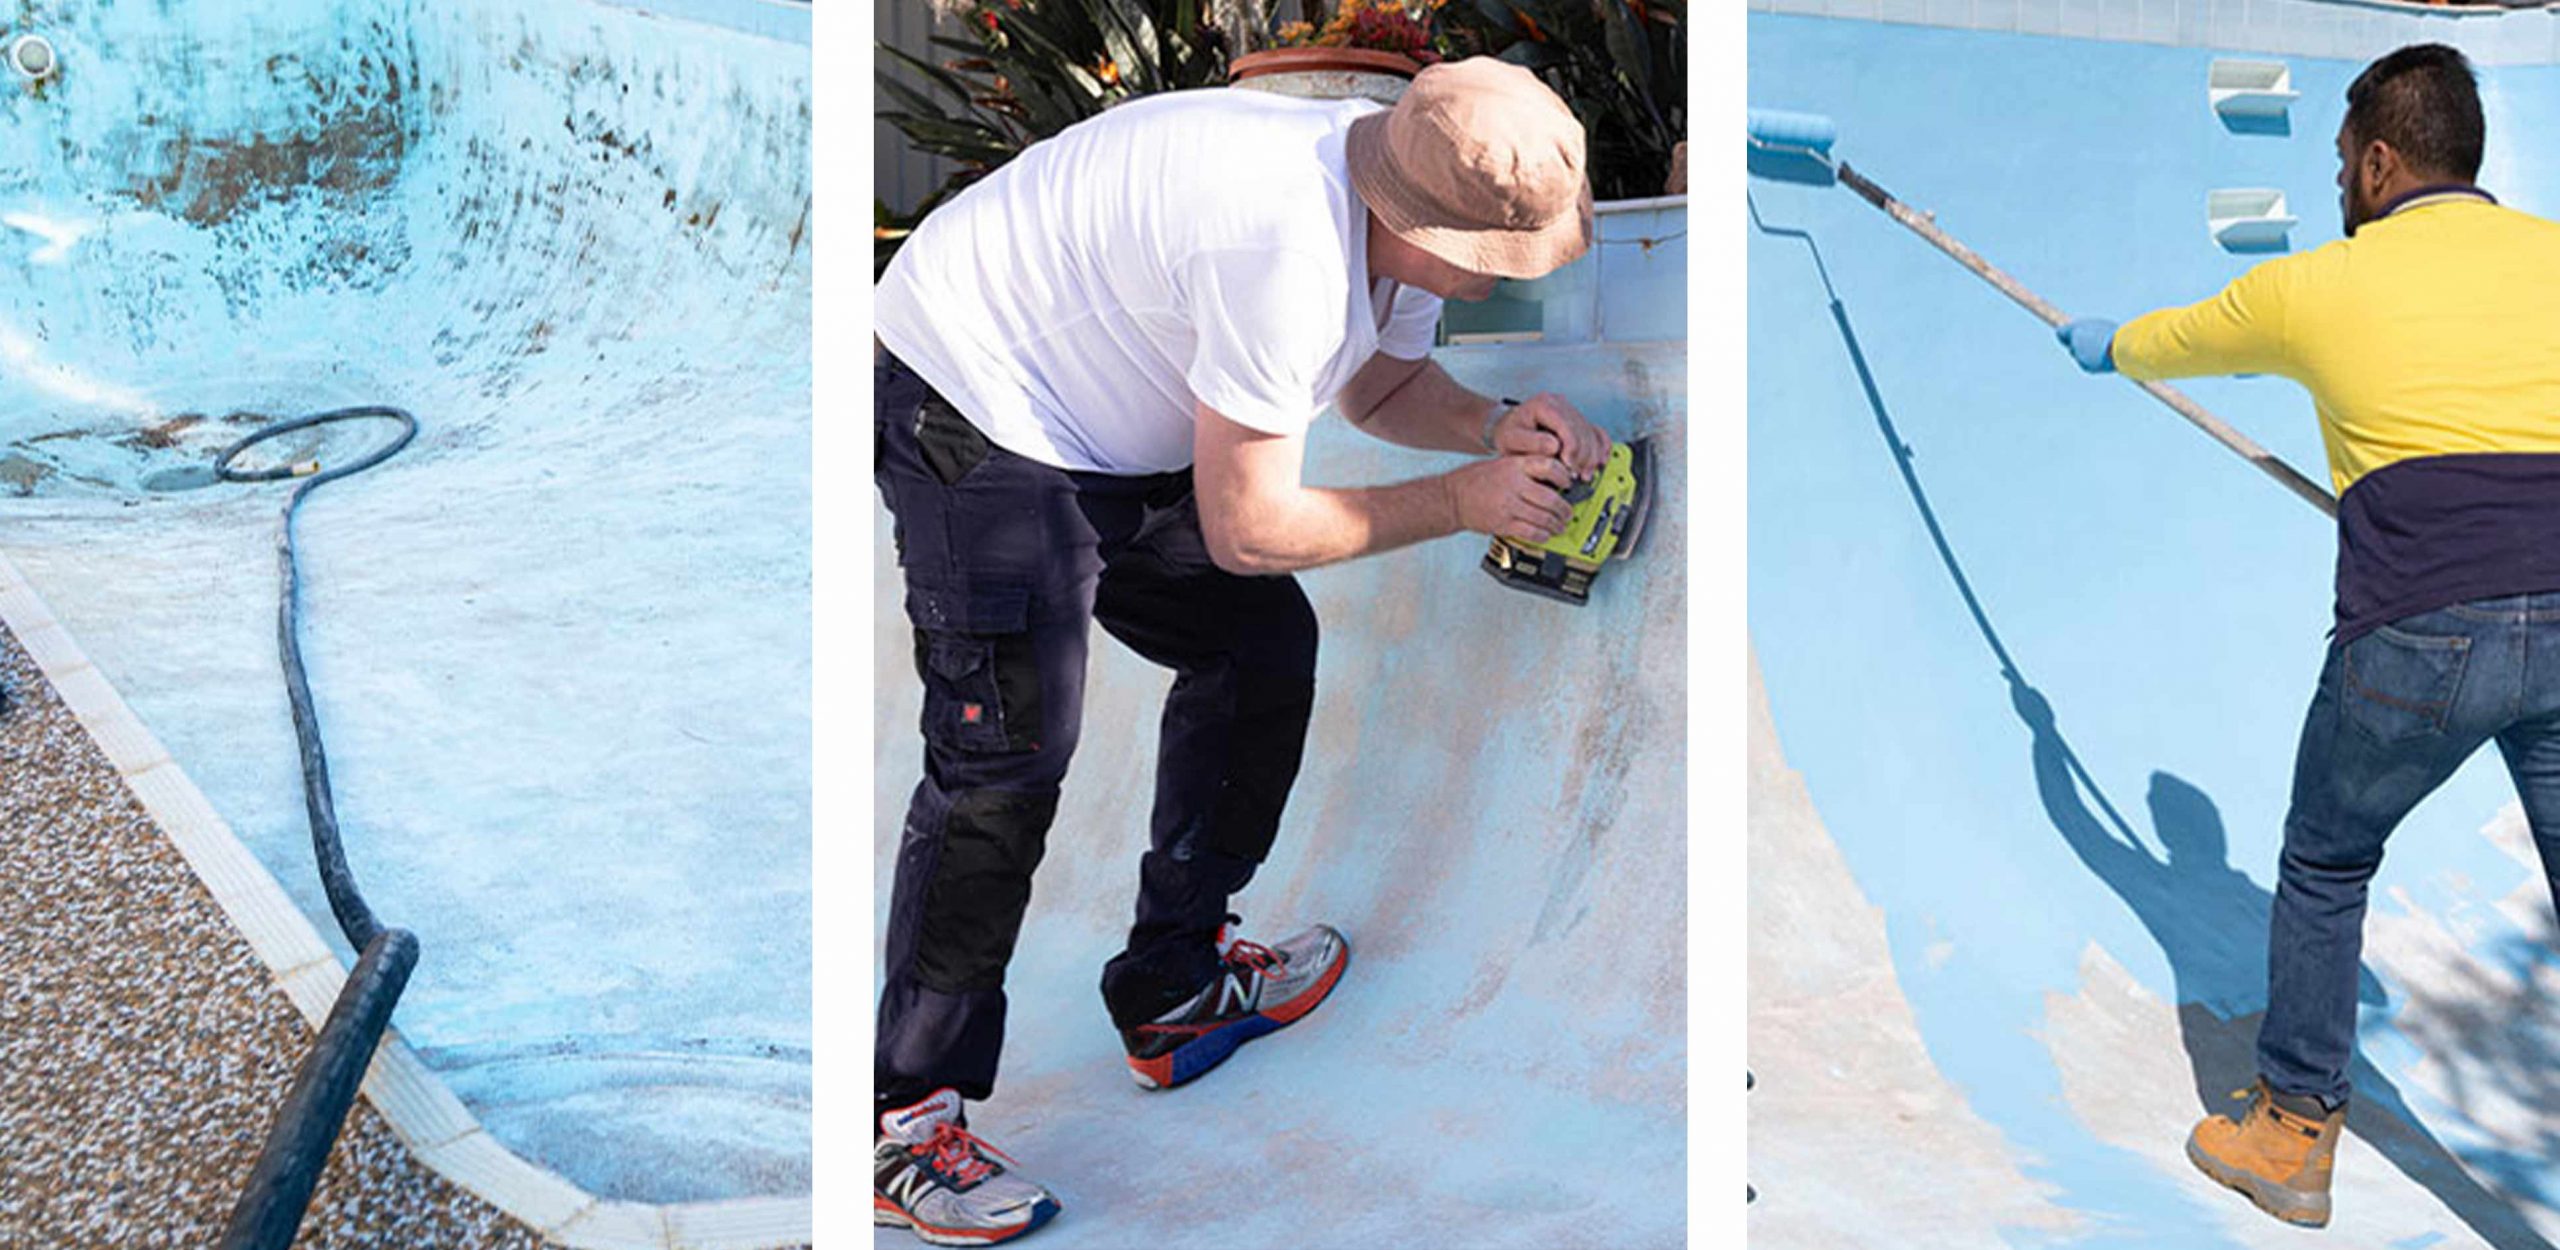
2. Drain Your Pool
You will need to fully drain your pool. Even the little bit of water that collects at the bottom of the pool must be removed. You will also want to be sure that if your water is dirty, that you get all debris out of the pool at the same time. The best way to collect all of the plant debris and other floating contaminants is to set your pool filter to waste as you drain the pool. Use a water pressure cleaner to deep clean exposed surfaces as the pool drains.
3. Scrub the Pool
During this step, you are going to clean all of the surfaces thoroughly as the pool empties. You need to be sure to remove algae, debris, any sludge from sunscreens and other contaminants, and actual particulate matter that is not being collected by the filter as the pool drains. Scrub the pool using a still broom or brush each time the water line moves down as the majority of the contaminants will ride on the surface of the water and be deposited each time the water line comes down.
4. Prepare Your Surface
Now it is time to scrape off the old paint or sealant that is on the pool. You will want to wipe down the surfaces with a wet rag after to remove any dust and a wet and dry vacuum can help pick up the larger particulate that you are scraping off. Sandpaper is a really big help here, we recommend an 80-grit, but DO NOT use an orbital sander.
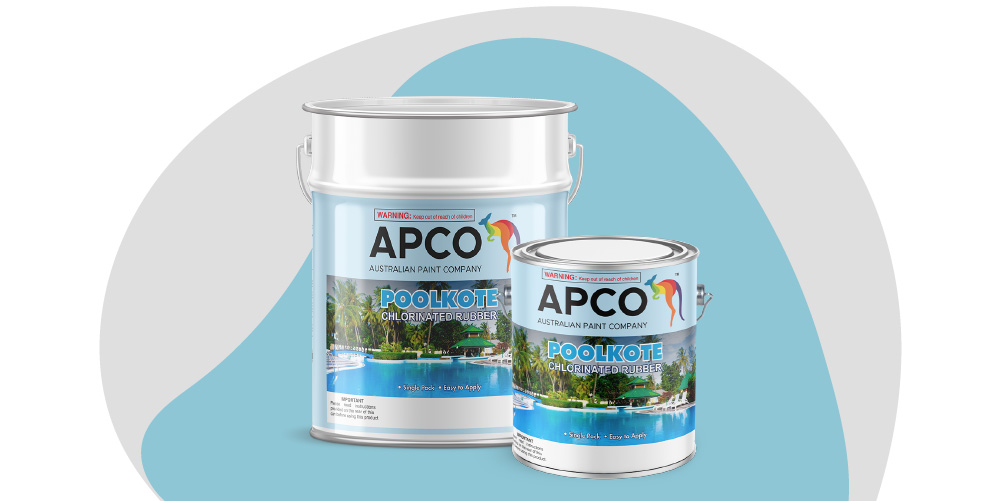
5. Prepare Your PoolKote Chlorinated Rubber Paint
There are two kinds of preparation processes that you might need to follow to refresh your pool surface with Chlorinated Rubber. One process is for pools that have already been treated with this product before, and the other is for pools that are bare concrete and have never been painted.
For pools that have been coated with Chlorinated Rubber before, follow these steps:
a. Clean the surfaces of the pool and remove any slime, debris, and other buildup. Make sure that the pool is perfectly dry before going any further with your work.
b. Perform a check to ensure that the surface to be painted is Chlorinated Rubber paint. You can test this by placing a rag dampened with Chlorinated Rubber Thinners, the existing painted pool surface and then scrub the surface for a minute. It is probably Chlorinated Rubber if the paint has become sticky when touched.
c. Abrade and sand the surface so that it will be able to accept the new material when applied.
d. Repair any imperfections in the surface caused by damage to the coating that was installed before. You cannot leave imperfections on the surface of the coating or you will have pits and divots in the final product.
e. Spot prime cement spots that might be sticking through the existing layer of coating with a thinned version of Chlorinated Rubber.
For pools that are at the stage of bare cement render, follow these steps:
a. Clean the surfaces of the pool and remove any slime, debris, and other buildup. Make sure that the pool is perfectly dry before going any further with your work.
b. Use an acid etch to make the surface ready to accept the coating that you are going to apply. To achieve this. Use commercial Hydrochloric or Muriatic Acid. For new cement render use 1 part acid to 2 parts water, and for old cement render use 1 part acid to 3 parts water. You should always mix the etching solution in a plastic bucket, always adding acid to water, not water to acid.
c. Apply the etching solution to the pool surface, taking care to only do a small area at a time, using a plastic watering can. Then immediately use a nylon broom to scrub that area thoroughly. As soon as the bubbling reaction stops (approximately 5-15 minutes), flush the entire area with fresh water and take care to never let the acid residue dry on the pool’s surface. Continue to the next section to the next section to be acid etched. Once the acid etching is successfully complete the surface should have a rough, sandpapery feel to the touch.
d. After the acid etching is completed the surface must be neutralised. First flush the surface with a solution of Bicarbonate of Soda and Water (1 kg of Bicarbonate of Soda mixed with 10 litres of warm water), then flush liberally with fresh water. It is important to concentrate on a small, workable, section at a time. This will ensure that no bicarbonate of soda is deposited onto the surface.
e. Allow the pool surface to dry prior to any further surface preparation. Sweep or vacuum any loose residue.
f. Repair any surface imperfections that you find for a good final result and finish.
g. Spot prime locations that needed to have this extra repair work done and any cement spots that you can see coming through.
Using PoolKote Chlorinated Rubber paint will make sure that your pool ends up looking refreshed and ready for summer. This is a solvent-based product that will improve the appearance of your pool as soon as it is applied. PoolKote Chlorinated Rubber paint comes in a variety of colors. You can choose from taupe and tan, greys and blues, or even green and purple! You will need a bucket or large painter’s tray for easy access with your roller and brushes.
6. Apply Your Paint
The coating that you apply of this product needs to be very thin. The Chlorinated Rubber paint will dry quickly and you need to be sure that you apply a thin enough coat that the color is consistent throughout your pool. You should start with the walls and work your way from top to bottom all the way around and then do the bottom of the pool, working your way back towards the steps, which you should do last.
To apply your paint, follow these best practices and steps:
a. You should always apply paint when the temperature is between 10°C and 30°C. You usually will have the best luck if you paint in the morning. Avoid humidity above 50%. Do not paint in direct sunlight. You might need to cover the pool with a sunshade if you live in a place that gets a lot of sun year-round. Make sure that you do not paint during a period where there will be rain. Rain will ruin your work, so you must avoid working in the rain at all costs.
b. Do not paint in direct sunlight to prevent blistering and make sure that you allow 4 hours after each coat to let solvents evaporate.
c. Paint on three to four thin coats of Chlorinated Rubber. Use a brush along the tile line and then switch to a roller for larger areas. Be careful to keep the coats thin.
d. If unexpected rain occurs between coats, be sure to drain off the ponded water and do not apply the next layer until the pool is completely dry.
e. Allow to cure for 10-14 days before filling your pool. You will want to wait at least 10 days in summer and a minimum of 14 in winter. Coatings that have not had time to dry can be damaged by adding water to the pool too soon.

7. Fill the Pool and Take a Dip
You can now fill the pool up with water. Make sure that you have cleaned out your pool filter and prepared it for the new water. There is nothing worse than filling up your pool only to find that you forgot this important step!
Once your beautiful new pool is full of water, do not add chemicals or chlorine to your pool for 3-5 days. You have now completed recoating your pool with PoolKote Chlorinated Rubber paint. Put on your favorite swimsuit, jump in and enjoy some quality pool time! You will have a beautiful pool that will hold up the challenges of weather and pH cycles and you will love how colorful and fresh your pool looks. It will feel like you have a brand-new pool!
Beautifying your pool has never been easier.